Decorate your own bunting kit

There’s nothing more pleasant than getting a few friends together be it for a birthday, a hen party, or just a general gathering. It’s even more pleasant to sit around a table with cake, a pot of tea and potter creatively.

In this world of electronic devices, we’re quick to find distraction in the latest app, browning the web or social media on a smart phone. It’s less often that you give craft a chance; occupying your time by using your hands to make stuff.

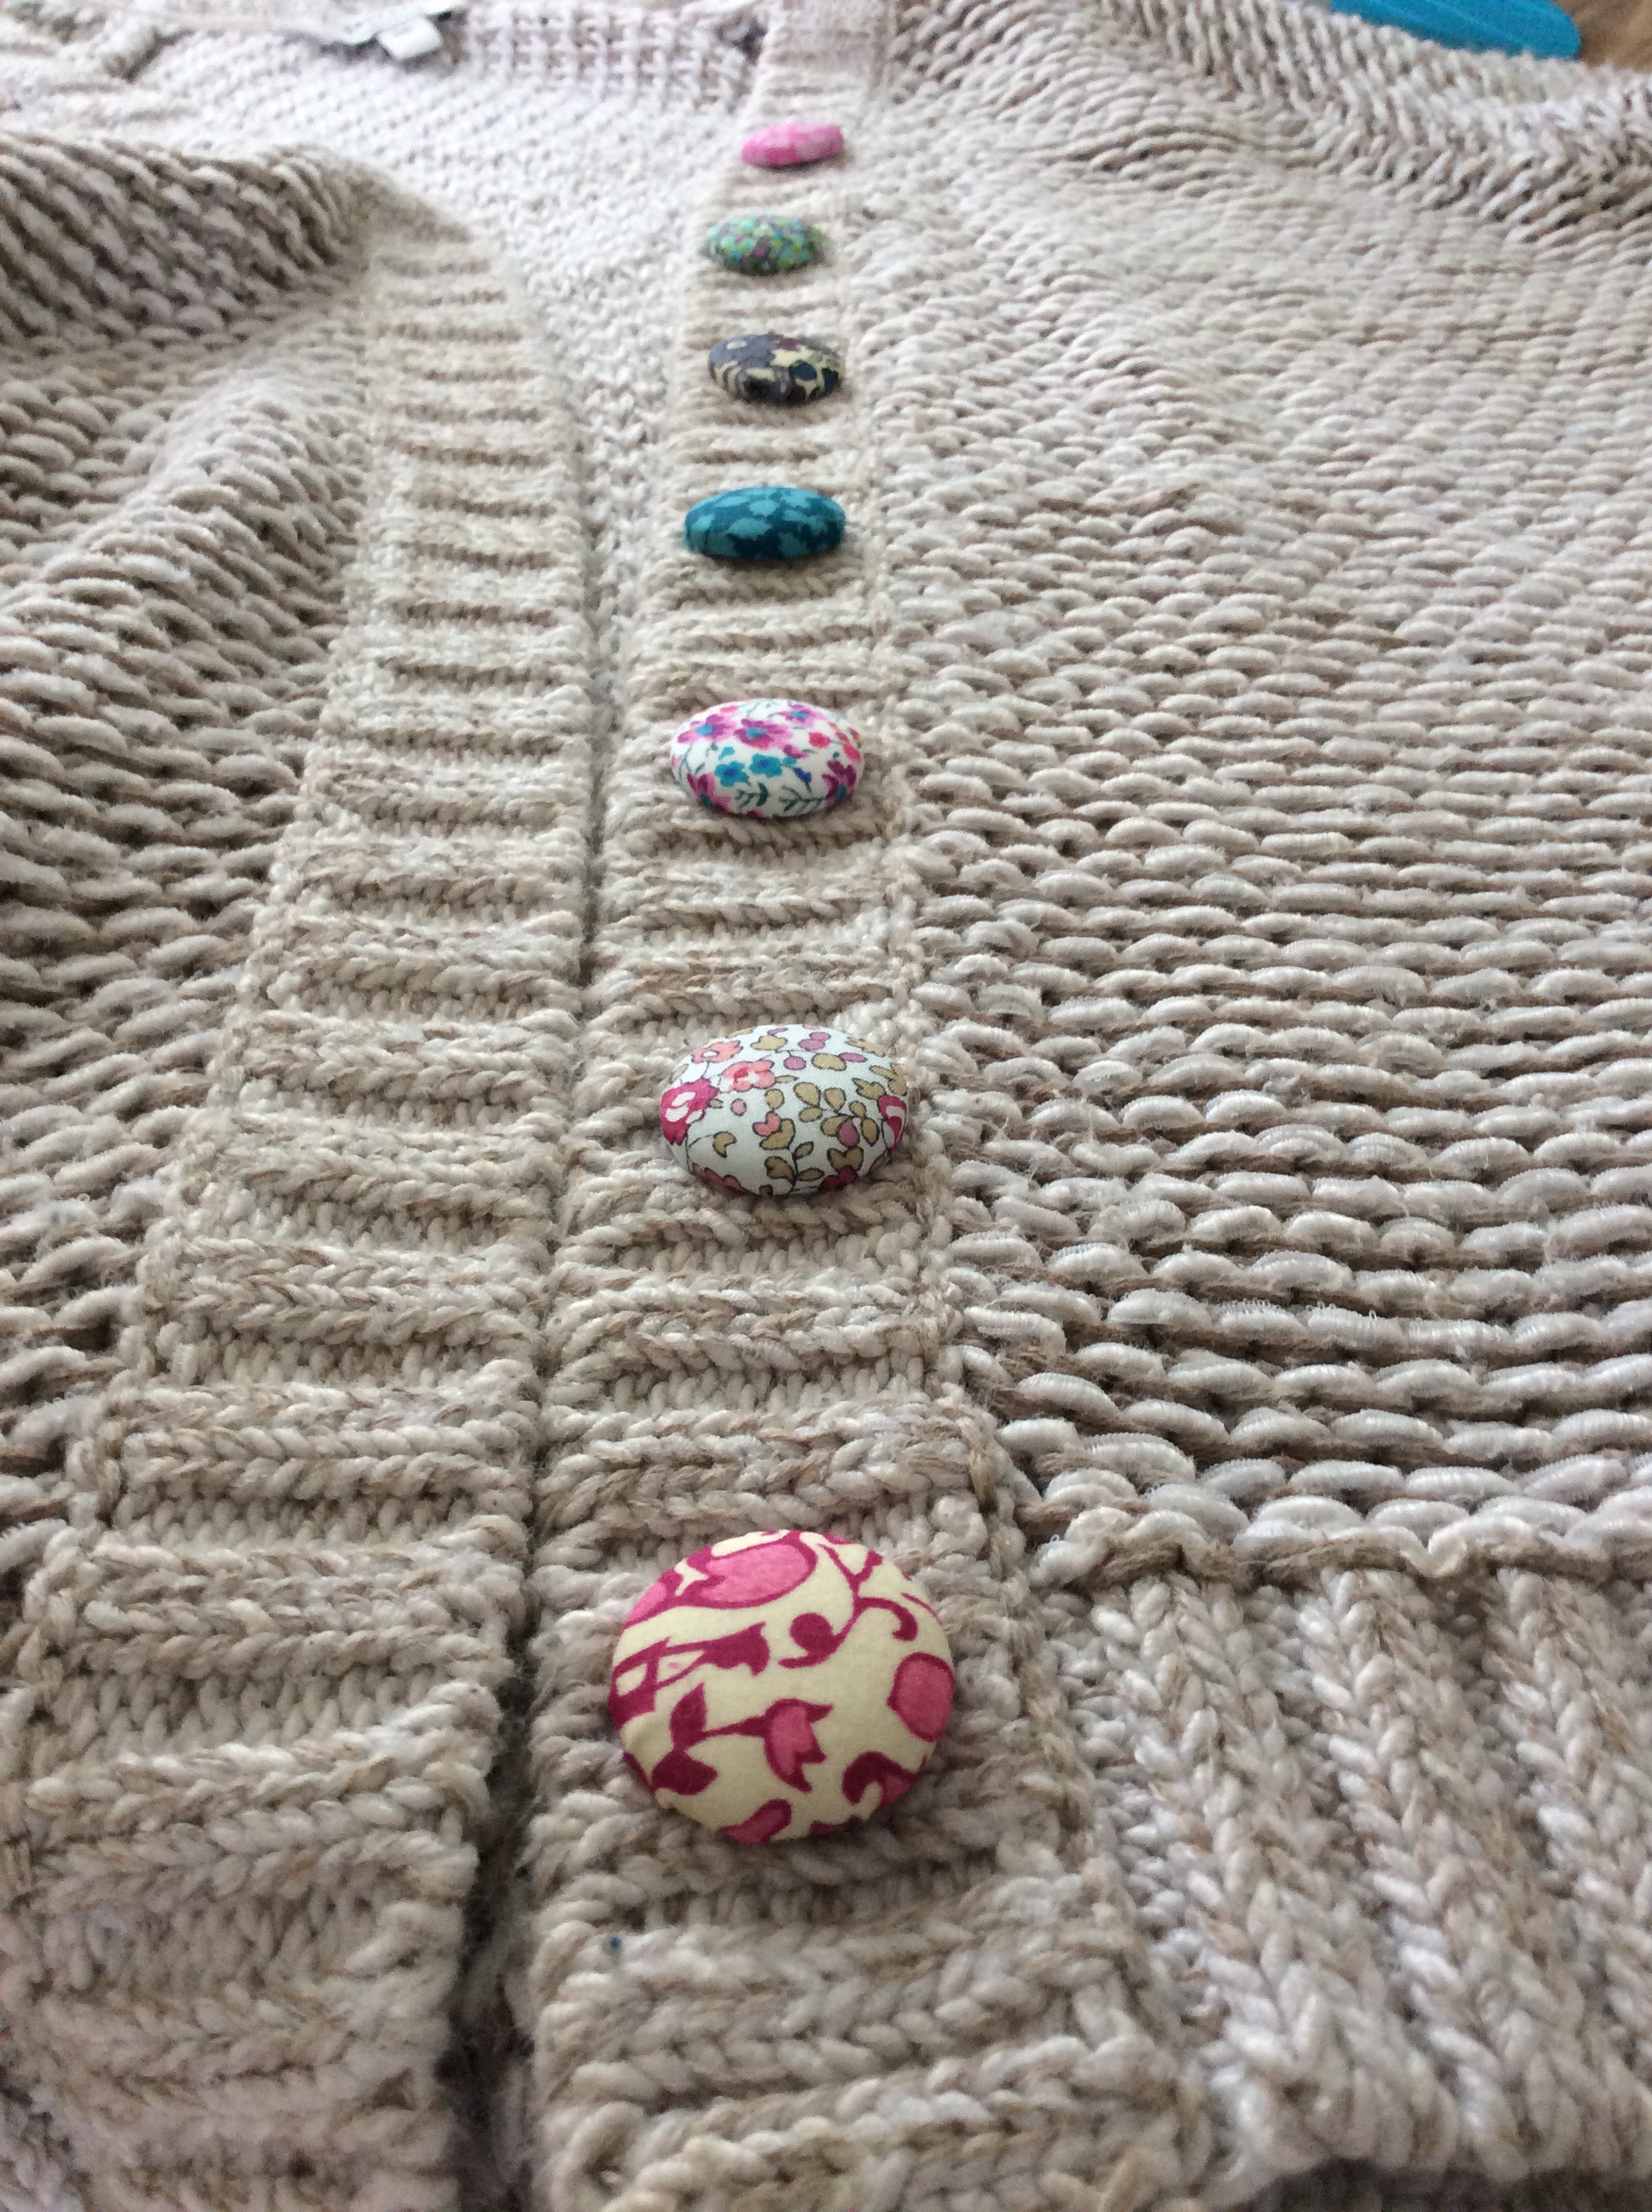
In this ‘decorate your own’ bunting kit, you get about 20 white, 100% cotton flags. You can decorate them with ribbons, buttons and vintage-style fabrics. If you’re nifty with a needle, you can tack the embellishments straight onto the flag. For those not so keen on sewing you have the option of using Bondaweb, magic iron-on webbing that sticks one surface to another.

I’ve already put my bunting up in the living room and a friend has already requested that we use the kit as an activity at her hen party!


There are a few suggestions as to how to decorate the bunting flags but this is by no means exhaustive. This is your chance to be creative and come up with some fabulous designs to make some unique, personalised bunting. It’s the ideal decoration for a wedding, christening, birthday or baby shower! Let’s all channel our creativeness together!

Decorate your own bunting kit on Picker’s Kits

Paper fairy light DIY lanterns

  
There’s something magical about fairy lights, they have the effect of making anywhere feel cosy! If you’d like to add a personal touch to your fairy lights, follow this simple guide. With Christmas coming up, these will be a festive addition to your decorations, and it only takes 30 minutes to make. With the pattern side on the inside, only when the light is on it the pattern revealed!

You will need:

– funky paper (about 90 gsm or less) with some white in the pattern
– fairy lights
– ruler
– scissors

How to make paper lantern fairy lights:

1. Cut your paper into squares, the one shown is 10.5 cm squared which will make quite small lanterns. If you’re looking for bigger lanterns, it might be best to experiment with different sizes and scrap paper.

2. Fold the square diagonally from corner to corner.

3. Pinch the fold between your finger and thumb at opposite sides and push it in. 

4. Flatten the paper into a triangle.

5. Fold the corners of the triangle down to the middle points on each side.

6. Fold the side points into the centre, repeat this for all 4 points.

7. Tuck the 4 spikey points into the folds created in the previous step. 

8. Fold the two end points into the centre and back again to create a fold line.

9. Poke your index fingers in between the little wing pockets and pull apart gently so that the lantern takes shape.

10. Place the fairy light through the gap in the lantern and hey presto!

If you’re looking for more DIY Christmas decorations to make, take a look at Picker’s Kits DIY Christmas decoration kit.

Felt ball Xmas decoration DIY kit

IMG_0405

How does Christmas come around so quickly every year? Yet again I’m feeling unprepared… must start thinking about which presents to buy for everyone soon!

When it comes to Christmas decorations, I like to make them myself. I admit, I have bought a few in the past but I do get lots of joy out of making them. Last year, I invited my friend Katie round and we sat and crocheted some baubles whilst drinking warm spiced apple juice (it was a work night!)

I think I caught the Christmas craft bug last year as I remember crocheting a family of snowman baubles, I’ve even dug out the photo!

2014-12-20 22.00.06

What I want to talk about is a new DIY kit recently added to www.pickerskits.co.uk – the felt ball Christmas tree decoration kit. It consists of eight felt balls, each one a different colour. I really love the style of this decoration, the wool of the felt balls gives you that cosy Winter feel and the bright colours will look fabulous against the green of the Christmas tree.

If you’d like to make your felt ball Christmas decoration, you can find it here on the Picker’s Kits website.

Fabric button rosette DIY brooch


If you’re looking for a brooch to brighten up your coat or jacket, this one’s the answer. It costs pennies, takes just 5 minutes to make and looks neat and pretty too! This would make a lovely gift, or would work as an ideal item to sell on a charity or fundraising stall.

You will need:

– a strip of fabric
– a large button
– safety pin and thread
– fabric scissors

How to make a fabric button DIY brooch:

1. Cut fabric into a strip, the one shown in the photo is 35cm long x 8cm wide. Fold it in half length-ways, wrong sides together. Do a running stitch along the raw edge with stitches about 1cm apart. A red thread has been used in the tutorial so that it stands out in the photo.

2. Pull the thread at either end so that the fabric crumples up.

3. Tie the two threads together, place a button in the middle, flip it over and sew it in place.

4. Sew a safety pin on that side if you’d like to make it into a brooch, and there you are!


A brooch in 5 minutes! If you’d fancy a button like the one used in the photos, check out the Liberty buttons kit on Picker’s Kits.

Infinity scarf DIY kit

With the weather getting colder, what is a better way to keep that chill away than a cosy, jersey infinity scarf?

This DIY craft kit is one of the latest additions to the Picker’s Kits collection. To make this accessory, you’ll need a sewing machine and about an hour of time. It’s the ideal project for a beginner as it involves lots of sewing in straight lines!
The scarf pictured incorporates hot, vibrant colours to compliment the muted tones of the Autumn and Winter season.

I’m a fan of the infinity scarf, and scarves in general really. You can never have enough colours or styles; at the last count, I think I had about 18. I like to wear a scarf with dark clothes, especially at work as it can brighten anything up plus adds a cosiness around your neck (and no worries of accidentally showing cleavage)!

Check out the infinity scarf with its fabulous zig zag multi-coloured fabric print. It’s the first infinity scarf to be added and I’m hoping to add more to the website very soon!


This kit would make an ideal gift for a crafty person you know (my mum has already earmarked one for a Christmas present!); or you can make it yourself then decide whether to give it away or keep it for yourself 🙂

Check out the scarf kit on Picker’s Kits

Liberty buttons DIY kit

Liberty buttonsYou might have already guessed that I really do love Liberty fabrics; the colours and patterns have a timeless look about them and the lawn texture feels so fine and delicate.

Another kit to add to the Picker’s Kits collection is the Liberty buttons kit. In the box is all you need to make some beautiful covered buttons. I couldn’t believe how easy it was to cover them, and the finish is so neat, even from the first button! All that’s needed is to follow the simple instructions and you have a fabulous set of buttons. Just add your own fabric scissors for a little trimming.

There are 20 buttons in a pack and all it takes is 20 minutes or less to complete them.

Liberty buttons kit
I’ve already used my buttons to brighten up a cardigan, it didn’t have any buttons or button holes so I sewed these buttons on purely for decoration 🙂

This kit is the ideal present for a crafty lady you know, or cover the buttons yourself and decorate your clothes until your heart’s content! Discover the Liberty DIY button kit here 

Lawn fabric DIY necklace kit

Liberty
DIY Liberty necklace kit from http://www.pickerskits.co.uk
Over the past few months, I’ve been ‘dabbling’ – trying to work on www.pickerskits.co.uk and kit development in the evenings. There’s still a heck of a long way to go but I’m on Twitter and have big plans for Pinterest and Instagram!

Let me tell you about the collection that started off the Picker’s Kits website: Liberty and lawn fabric necklace kits. They’re really simple to make and brighten up any outfit. I’ve been wearing mine all the time and have had so many people say ‘I like your necklace’ – to which I reply ‘I made it!’.

The necklace kits is ideal for anyone who wants to dip their toe into crafting, or even the seasoned crafters out there. It only takes an hour to make and would make a wonderful present. Pass the whole kit on or make it yourself and give the finished necklace away – the choice is yours!

I hope to increase the range of fabrics and kits soon. I adore Liberty fabrics… I was in London the other week in fact and had to browse the lovely fabrics. I just adore the vivid colours and patterns they have to offer (see photo below!)

If you’re looking for multiple necklace kits for parties or hen parties, get in touch – this is the ideal girly activity and great for all ages and abilities 🙂

Buy the DIY necklace kits here

Necklace craft kit
The paisley print lawn one
Liberty necklace
The Liberty one
Liberty, London fabrics
Some lovely Libertyfabrics patterns
Liberty store
The grand Liberty store

We have lift-off – new website

Picker's Kits

So here we go, after much blood (well not really), but maybe a bit of sweat and tears, I would like to finally launch www.pickerskits.co.uk.

I’m one for the ‘agile’ way of working which means releasing things as soon as they’re ready hence there’s the grand total of four products. I’m busy working away in the wings developing some new kits, just stay posted! There’s also a lot more I’d like to do with the website… I’m in the process of learning HTML so I should hopefully be able to do some snazzy things with it soon!

Picker’s Kits is a website of craft kits for busy ladies – time is short enough so it’s a little nudge to help you be more creative and just get enjoyment out of making things.

You might be looking for a present for a female friend who likes making things, or you might want to make it yourself and gift the finished product. Whatever you do, I hope that you find what you’re looking for!

Discover the lovely kits here